No manufacturer
No supplier

Thu, 25. Aug 2022
iPhone camera settings: 5 tips for photographers
As a professional photographer, Alex Lörtscher works almost exclusively with professional equipment. He is also passionate about photography in his private life, more and more with his iPhone camera. This is how the idea for his new iPhone photography course came about. In this article, the professional photographer explains to you what you should pay attention to when taking photos with your iPhone, so that you can take more beautiful photos.
Basics before you start the camera app
Tips before you start with the actual photography? Don't worry: We won't go into a lot of detail about choosing the right subject or the best location to use your iPhone camera.
- Pro-tip #01: Prepare yourself mentally for your next photo assignment. Think about a specific topic that you would like to photograph. Consciously take your time when taking photos, don't let yourself be disturbed and activate the iPhone flight mode 😉
Which iPhone photo settings are important for successful photography?
Depending on the model, you have different options for iPhone camera settings. The background: not every iPhone model has the same number of lenses. For example, the iPhone 11 has the following lenses: standard wide angle (1x), telephoto (2x) and ultra wide angle (0.5x). The iPhone's settings look like this:
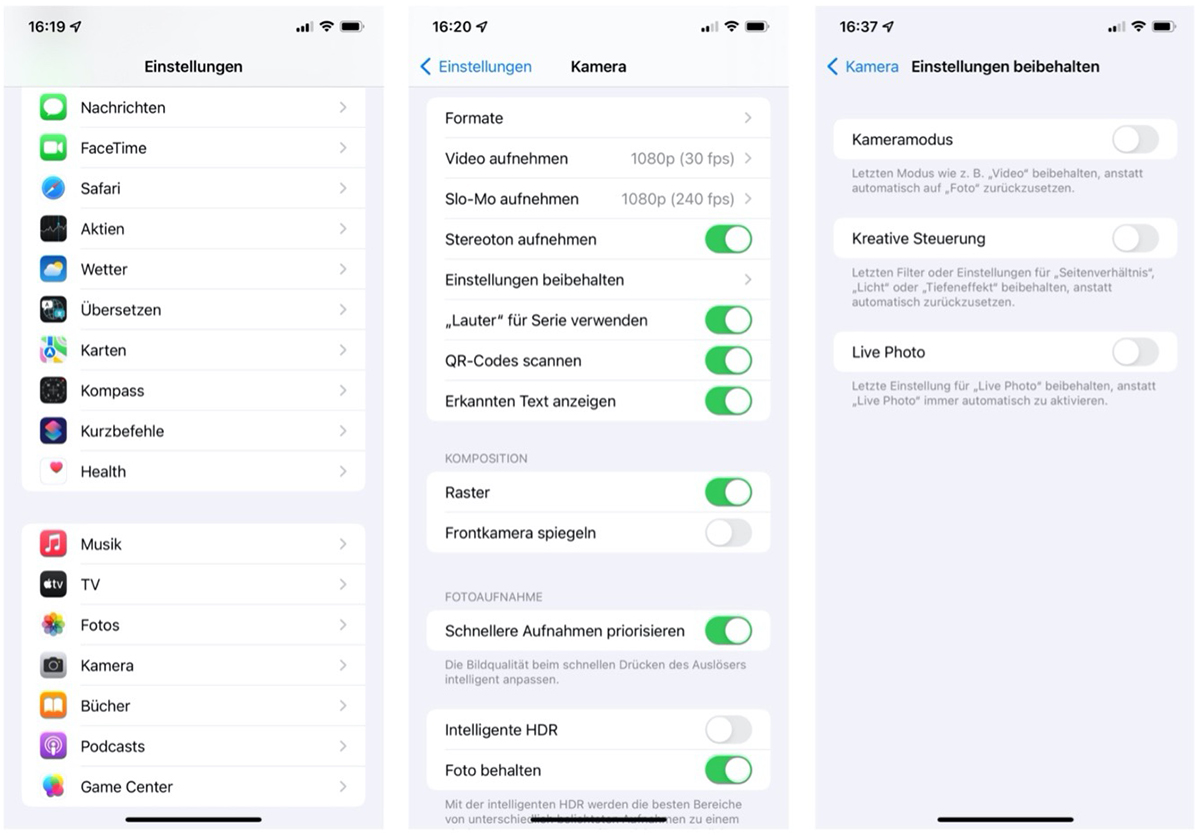 «Formats», «Preserve Settings», «Grid» and «Smart HDR», the most important settings for taking photos with your iPhone camera.
When you buy a new iPhone, the settings in your camera app are initially set by default. However, Alex recommends you to change this setting and especially to activate the grid lines. These grid lines serve as orientation for your image composition.

Important iPhone camera setting: Activating the grid lines makes it easier to compose your picture by aligning your subject to the intersection points of these lines (red dots).
The grid divides the iPhone screen into nine rectangles when taking pictures. This gives you two horizontal and two vertical lines. The lines create intersections that you can use to align your subject. You can also use them to straighten the horizon when taking landscape photos, for example.
When taking photos with your iPhone, make sure to place your subject on one of the line intersections if possible. This way you make your photos more interesting for the viewer and also apply the rule of thirds, which is popular among photographers.
- Pro-tip #02: Adjust your iPhone so that you can operate it "blindly" and take a photo at any time using the direct quick access to the camera app (swipe left on homescreen). This way you avoid hectic typing and never miss a subject again!
Set the iPhone camera correctly: The most important functions of your camera app
To check the settings of your iPhone and make adjustments, open the app "Camera" under "Settings". Below, Alex shows you which settings you should now check and what they mean.
- Formats: Under "Formats" you can define how your photos and videos should be saved on your iPhone. This is less relevant for the recording itself. However, if you want to transfer the pictures later to a Windows computer or an Android smartphone without any problems, for example, you should definitely select "Maximum compatibility" here.
- Keep settings: You can set the camera mode here. If this is activated, the last function used appears again when you open your camera app. The same applies to the "creative control": If this is activated, the photo settings are opened again (and not reset). With "Live-Photo" (explanation below) you can also keep this live setting.
- Grid: You can use this slider to make the grid lines described above visible in your app when taking photos. This function is activated and helps you to develop a feeling for the image composition when taking photos, especially in the beginning.
- Mirror front camera: If this slider is activated, the photos of the front camera, i.e. the camera that you use for selfie photos, for example, are saved mirror-inverted. If, for example, you take a selfie in which you want to see writing, you have to deactivate this function.
- Intelligent HDR: With this function, your iPhone creates photos with different exposures and merges them into one shot. This compensates for differences in exposure in your photo. Activate this feature to let your iPhone handle difficult lighting situations automatically.
- Keep photo: If you activate the "Keep Photo" function, your iPhone saves the various photos taken in HDR mode separately. Note that your iPhone only uses HDR mode when it is most effective or when the lighting situation requires it.
To make the most of your iPhone photos, you should therefore have the line grid activated when taking photos with your iPhone and be able to use the "live mode" and the HDR function correctly. These iPhone camera settings are the most important.
In the following, Alex explains what you should pay attention to and how you can use them to take pictures that stay!
When should you shoot in HDR mode?
In HDR mode (HDR stands for "High Dynamic Range") you can take photos in more difficult lighting situations. An example: If you shoot backlit and have shadowy and sunny areas in your photo, the mode is a good choice.
When using HDR in the background, your iPhone creates not just one image, but several. The images are exposed differently and then digitally merged into one photo to achieve a better result in such a backlit situation.
For this reason, Alex recommends that you switch this HDR mode on and off manually and deactivate the "Intelligent HDR" mode in your camera app. Also note that the HDR icon on your iPhone camera is only visible when you have disabled Intelligent HDR mode.
- Pro-tip #03: Deactivate the HDR mode once when you take photos of passers-by in bright sunlight with a lot of shadows cast on the street. This will give your photos more contrast and a great expression.
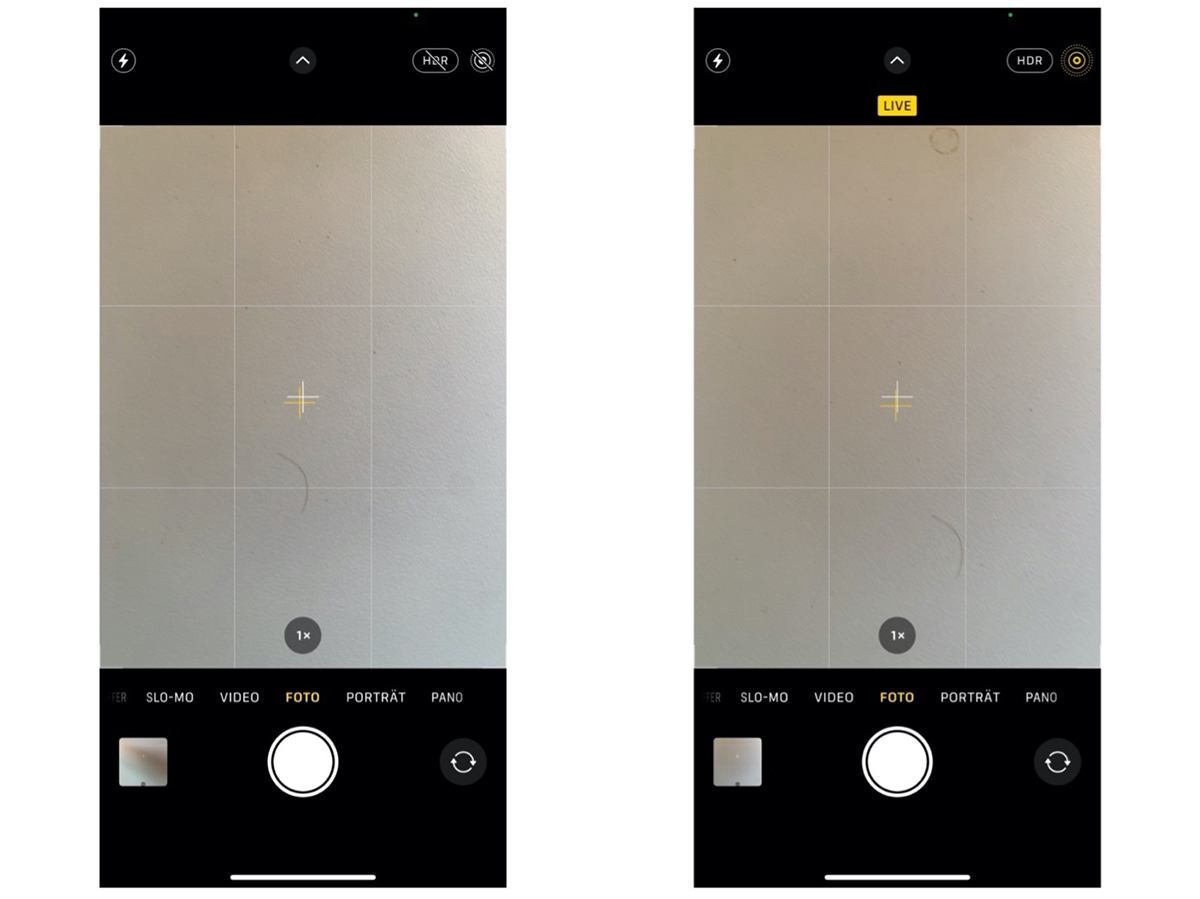
If you have deactivated Intelligent HDR or Auto HDR, you can switch "HDR" (top right) on and off manually in the camera app. You will also see the "Live" function in the top right-hand corner.
Why should you shoot in live mode?
When you shoot with your iPhone's live mode, you take a whole sequence of pictures at a time. This way, you hardly ever miss a smile, because you can choose your favourite photo in this image sequence afterwards. The live mode is therefore a kind of "backup" for you as a photographer, so that you don't miss anything.
In addition, this live mode offers you creative additional functions when photographing with your iPhone: For example, you can photograph flowing waters with a great wipe effect, i.e. make long exposures, endless loops and ricochets. You can then adjust the effects afterwards in your live photos.
- Pro-tip #04: By default, Alex recommends that you do not activate this live mode, as such live photos require significantly more storage space on your iPhone.
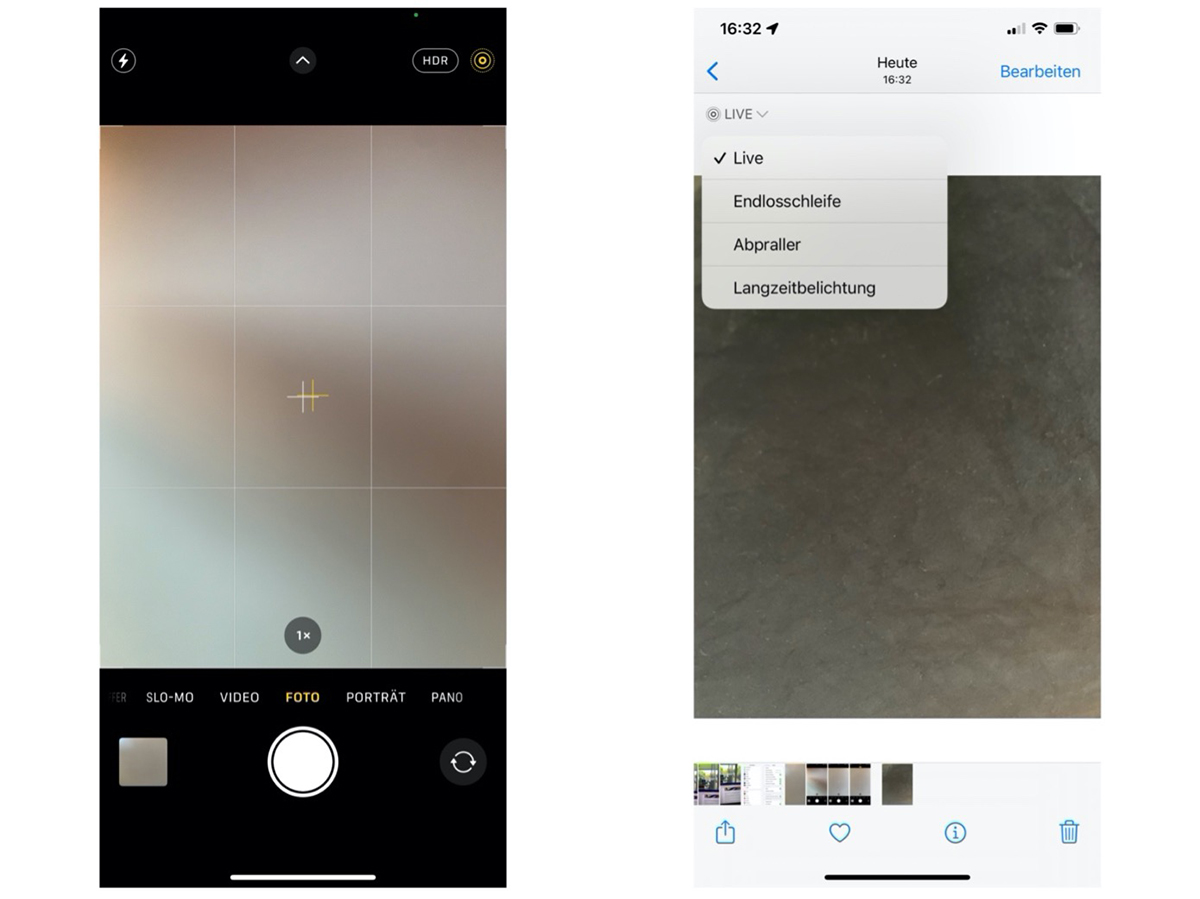
When taking pictures in live mode, you have the effects "infinite loop", "bounce" or, for example for flowing water, "long exposure" as an option at the top left of the picture.
In addition to the general iPhone camera settings explained here, you naturally have various setting options in the iPhone camera itself. Again, some of these functions differ depending on the iPhone model you are using.
Of particular importance for us iPhone photographers are, of course, the camera modes "Photo", "Portrait" and "Pano" for unique panorama photos. Alex explains these iPhone camera functions in detail in his iPhone photography course.
- Pro-tip #05: Use the somewhat hidden series mode for sports photos. Similar to the live mode, it creates a series of pictures as long as you press the shutter button. You can activate the series mode by pressing the shutter release button and moving it to the side or by triggering your photos via the volume control.
Which iPhone camera settings are really important?
Now that you know the most important settings for taking photos with your iPhone, one question remains. Which settings are really important?
You should ask yourself whether you only want to take photos with your iPhone. The right settings also depend on your personal attitude and your individual ambitions... 😉
In general, Alex can give you the following recommendations:
- Activate the display of grid lines in the iPhone camera settings to make your image composition easier. This is especially important if you have just started taking photos. Over time, you'll get practice, train your eye and be able to do it without.
- Use the live mode selectively and switch it on manually when photographing people or animals, for example. This gives you more options for image editing later. Caution: Photos in live mode require additional storage space!
- Only activate Intelligent HDR or Auto HDR (depending on the iPhone model) in the settings if you want to get the most out of every lighting situation. In other words: only when you just want to take photos. And remember: high-contrast photos in bright light (without HDR function) make for expressive photos!
With your knowledge of these three settings, you now have a good basis for beautiful and high-quality iPhone photos. Maybe this seems a bit technical to you, so practice makes perfect!
Conclusion: You can adjust quality with your iPhone camera
Speaking of practice: If you want to deepen your photographic knowledge and take more beautiful photos with your iPhone, Alex offers you a unique iPhone photography course in 30 short lessons. With the right settings and the course, the quality will come naturally.
Alex shows you key techniques for great iPhone photos and the most important apps. After his online course, you will definitely take better pictures with your iPhone camera and impress those around you with your iPhone photos. That's a promise!
Hopefully, these tips from Alex will help you take more beautiful photos with your iPhone. If you want to give him feedback on his tips or his iPhone photography course, feel free to comment below this post!
To the iPhone photography course

More information about Alex Lörtscher:
https://www.alexloertscherfoto.ch
Related posts
-
 Interview with Hans Burkhardt
Where do you like to read best? Sitting at a table. Surely not lying, not on the beach and not in bed. Learn more...
Interview with Hans Burkhardt
Where do you like to read best? Sitting at a table. Surely not lying, not on the beach and not in bed. Learn more... -
7 Tips for Designing the Perfect Holiday Photo Book
The most beautiful moments of your summer in the best photo book.
-
Fotobuch gestalten
Nach der Pflicht die Kür, nach der Planung die Gestaltung. Im zweiten Teil seines Artikels für das Fachmagazin...
-
Ein Fotobuch richtig planen
Haben wir von Famlienbloggerin und Fotobuch-Expertin Kristin Reinhard erfahren, wie man ein Foto-Jahrbuch mit...
-
Create a photo yearbook with family photos
Designing a yearbook with family photos doesn't sound particularly exciting or even difficult, does it? All you have...
